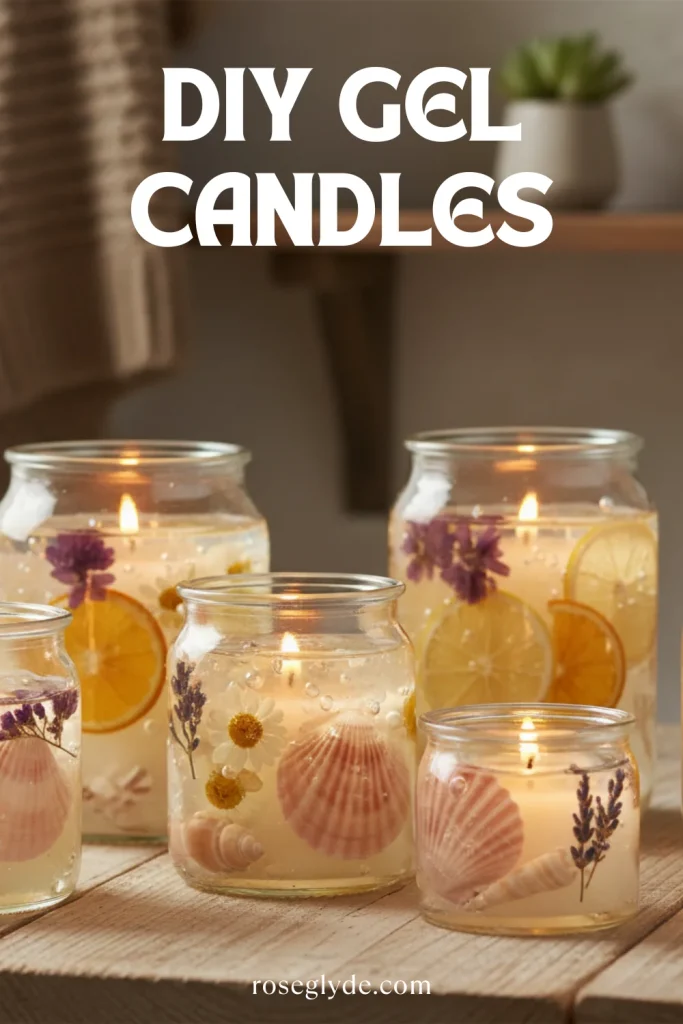
DIY Gel Candles: Stunning Transparent Candles You Can Make at Home
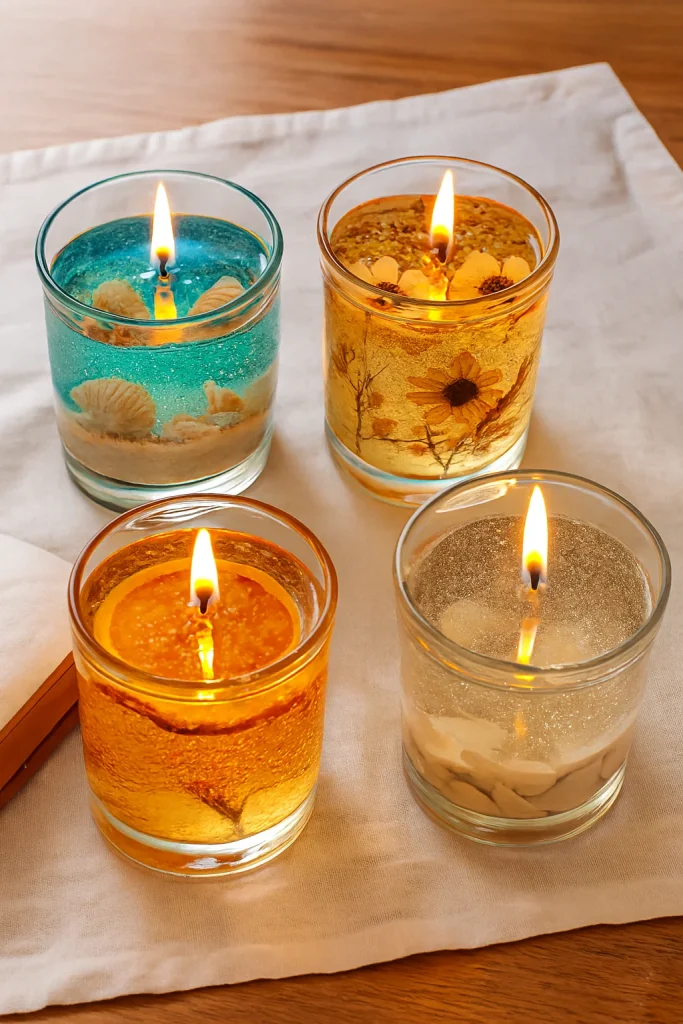
There is something undeniably mesmerizing about the glow of a candle, but transparent candles take that ambiance to an entirely new level. Unlike traditional wax blocks that mask the interior, gel candles offer a crystal-clear window into a miniature world of your own creation. Whether you want to suspend delicate sea shells, sparkling glitter, or intricate botanical elements, learning how to make transparent candles allows you to blend the art of sculpting with the practical warmth of home lighting.
In this guide, you’ll learn everything you need to create your own transparent gel candles, from materials and step-by-step instructions to decoration ideas and beginner mistakes to avoid.

What Are Transparent Gel Candles?
Unlike traditional wax candles, gel candles are made from a mineral oil-based gel instead of soy or paraffin wax. The result? A clear, glass-like candle that allows you to embed decorative items such as shells, stones, dried flowers, or glitter inside.
The transparency gives a magical floating effect — perfect for home décor, gifts, or event centerpieces. Plus, gel candles burn longer than most wax candles, making them both beautiful and practical.
What You’ll Need to Make DIY Gel Candles
Before you begin, gather all your materials. You can find most of these easily online or at craft stores.
Supplies:
- Clear candle gel (medium or high-density type works best)
- Heat-resistant glass containers or jars
- Candle wicks (Rigid wicks that stay upright in melted gel. Avoid cotton wicks, which absorb gel and cloud up.)
- Fragrance oil (optional but recommended)
- Liquid candle dye (for color tinting)
- Thermometer
- Wooden skewers or wick holder
- Non-Flammable Embeds (shells, pebbles, dried flowers, beads, heavy metallic charms etc.)
Important Safety Warning on Embeds:
Never use flammable materials like plastic toys, dried paper flowers, or unregulated fabric inside your transparent candles. As the wick burns down, these objects can catch fire, turning your beautiful creation into a severe fire hazard. Stick strictly to glass, stone, ceramic, or treated seashells.
Step-by-Step: How to Make Gel Candles at Home
Follow these simple steps to create your own mesmerizing DIY gel candles.
Step 1: Prepare Your Container
Make sure your glass container is clean and dry. Any moisture or dust will cloud the gel or create bubbles. If you’re using decorative items like shells or stones, wash and dry them thoroughly.
Step 2: Anchor the Wick
Secure your wick at the bottom center of the container using a dab of hot glue or a wick sticker. Use a wooden skewer or pencil to hold it upright as you pour the gel.
Step 3: Melt the Gel
Cut the gel into small pieces and place them in a double boiler. Slowly heat until the gel reaches around 200°F (93°C). Stir gently — avoid vigorous mixing to reduce air bubbles.
Step 4: Add Fragrance and Color
Once the gel is fully melted, remove it from heat. Add a few drops of fragrance oil (about 1/3 teaspoon per cup of gel) and a tiny amount of liquid dye if you want a tinted look. Stir slowly to combine.
Tip: Clear candles look elegant, but adding a slight tint — like soft blue for ocean vibes or amber for cozy warmth — enhances the aesthetic beautifully.
Step 5: Pour and Decorate
Carefully pour a small layer of gel into your container. If you’re adding decorations, place them now while the gel is still warm but slightly thickened. Continue layering until the container is full.
Avoid placing flammable decorations (like dried flowers or paper) directly near the wick — keep them along the sides for safety and beauty.
Step 6: Cool and Trim
Let your candle cool at room temperature for several hours. Once fully set, trim the wick to about ¼ inch. Your stunning DIY gel candle is now ready to display or gift!
The Great Bubble Debate: To Keep or To Clear?
When making transparent candles, bubbles are inevitable. In some designs—such as underwater ocean themes—bubbles add a beautiful, realistic texture. However, if your goal is an immaculate, glass-like finish, here is how you can manage or eliminate bubbles entirely:
- The Heat Gun Method: Immediately after pouring, sweep a heat gun over the top surface and the glass sides of the candle. This warms the glass and coaxes trapped air bubbles to rise and pop.
- The Window Treatment: Leave your finished, cooled candles sitting on a sunny windowsill for a few days. The natural, gentle warmth from the sun will slowly draw micro-bubbles up to the surface over time.
- Pouring Temperature: Pouring the gel on the hotter side (around 205°F) allows air to escape more easily before the medium hardens, whereas cooling gel traps bubbles firmly in place.
Common Mistakes (and How to Avoid Them)
Even though DIY gel candles are beginner-friendly, there are a few common pitfalls to watch out for:
- Cloudy Gel
→ Usually caused by overheating or moisture. Always melt slowly and ensure containers are completely dry. - Too Many Bubbles
→ Stir gently, avoid overmixing, and let the gel rest a few minutes before pouring. - Sinking Decorations
→ Let the first layer cool slightly before adding heavier items, so they stay suspended. - Wick Problems
→ Use the correct wick size. Too thin = poor burn; too thick = smoking flame. - Uneven Burning
→ Center your wick carefully and keep your candle away from drafts during cooling.
Safety Tips for Gel Candles
- Always use heat-resistant glass containers.
- Keep the wick centered and trim it before each burn.
- Never use flammable decorations inside the gel.
- Burn on a stable, non-flammable surface.
Why You’ll Love DIY Transparent Gel Candles
- They look luxurious but cost very little to make.
- You can personalize them endlessly — from seasonal themes to gift ideas.
- They make perfect handmade presents for birthdays, weddings, or cozy home décor.
- They’re a fun, relaxing craft that lets your creativity shine through.
Show Off Your Luminescent Creations!
Mastering the art of making transparent candles unlocks endless creative avenues for personalized gifting and stunning home decor. With a bit of patience and the right materials, you’ll soon be crafting gorgeous, glowing works of glass-like art.
Have you tried making gel candles yet? What unique items are you planning to embed? Drop a comment below and share your crafting journey with us!
Final Thoughts
DIY gel candles are more than just a craft — they’re a way to bring creativity, warmth, and personal touch into your home décor. With a few supplies and some imagination, you can make transparent candles that look like art pieces on your coffee table or bathroom shelf.
So, gather your materials, pick a theme, and start crafting your own stunning transparent gel candles today. You’ll be amazed at how simple — and satisfying — this project can be.
Related
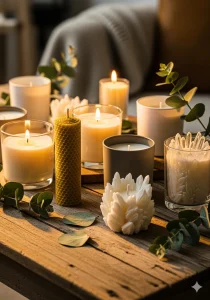
- 10 Creative Candle Ideas: Fancy, Botanical, and Beyond
- DIY Pressed Flower Candles for a Botanical Look
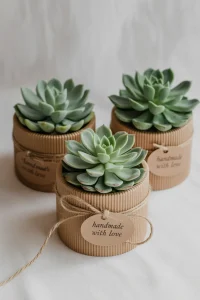
- DIY Succulent Candles That Look Almost Real
- How to Make Coconut Shell Candles for a Tropical Vibe
- Palo Santo Candles: A Guide to Spiritual & Relaxing Scents