
Fall Garden Checklist: 9 Essential Autumn Gardening Jobs
There’s a particular kind of tiredness that arrives with the first real autumn wind — the garden looks spent, the tomatoes have given up, and the whole place seems to be asking to be left alone until spring. But an hour or two of deliberate put-to-bed work now pays back many times over in April, when the garden wakes up tidy, protected, and ready to grow instead of needing rescue first.
This isn’t a marathon makeover or a perfection project. It’s a simple fall garden checklist: the handful of garden jobs that genuinely matter, in an order that makes sense, with nothing that requires a big budget. Some of these are about protecting plants through winter; some are about making spring-you very grateful. Work through them over a couple of mild weekends and the garden goes to sleep properly.
One quick note before you begin: autumn gardening looks different depending on where you live. In colder regions, the priority is protecting roots and containers from frost. In milder climates, autumn can be an excellent planting season, and some plants may continue growing throughout winter. Adjust this checklist to your local weather rather than following the calendar alone.

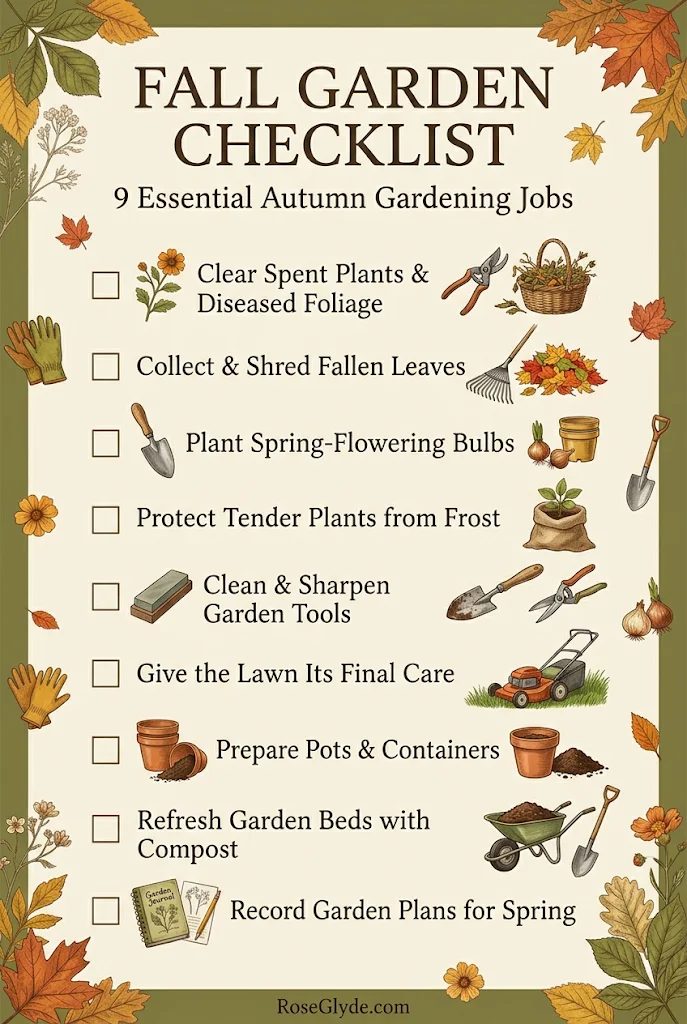
1. Clear the Spent, Keep the Useful
Start with the obvious: pull out the annuals that are finished, cut back the mushy foliage, and clear anything diseased into the bin (not the compost — compost rarely gets hot enough to kill disease). But resist the urge to strip everything bare. Hollow stems, seed heads, and a little standing foliage are winter shelter for beneficial insects and a seed pantry for birds. The tidy-but-not-sterile bed is the goal.
Where to start: Walk the beds with a trug or bucket and do one pass: anything blackened, slimy, or clearly diseased goes; anything structural and dry stays. It takes less time than a full cutback and the wildlife will use every stem you leave. My wildlife-friendly garden post goes deeper on which “mess” is worth keeping through winter.
2. Deal With the Leaves (Your Free Mulch)
Fallen leaves are autumn’s best free resource and its most common excuse for procrastination. Left in a thick wet mat on the lawn, they’ll smother the grass; shredded and spread on beds, they’re a protective mulch that feeds the soil as it breaks down. A mower with a mulch blade reduces a mountain of leaves to a useful layer in minutes — no bagging, no hauling.
Where to start: Mow the leaves on the lawn where they fall (mulch mode, no bag), then rake the excess onto the beds as a 2–3 inch mulch layer. Keep them off path edges and away from wall bases where damp can linger.
Budget-friendly tip: Spread shredded leaves in a loose layer of around 2–3 inches over established beds, keeping them away from plant crowns and stems. If leaves are whole and likely to mat together, shred them first or use a thinner layer
3. Plant Bulbs and Tuck In Last-Minute Plantings
If you haven’t planted spring bulbs yet, the window is still open while the soil is workable — daffodils, tulips, crocuses, and alliums planted now are next spring’s earliest color for pennies per bulb. It’s also the last comfortable moment to get any remaining nursery plants into the ground so their roots settle before the cold. Water them in well; autumn rain usually takes over from there.
Where to start: Pick one spot you can see from the window you’ll look out of most in March — that’s where the bulbs earn their keep. Plant in generous drifts rather than single rows; odd numbers read natural. For which varieties give the strongest autumn-to-spring show, my fall flowers post has the full planting list.
Bulb planting times vary. Daffodils, crocuses, and alliums are generally suitable for autumn planting, while tulips are often planted later in autumn in regions with mild winters.
4. Protect the Tender Ones
Anything borderline hardy for your area needs help now, not after the first hard frost. Move tender container plants under cover or indoors before nights turn properly cold. For plants staying out, mulch the crowns of perennials generously, wrap vulnerable pots (terracotta cracks in freeze-thaw cycles), and consider fleece or burlap screens for exposed shrubs in windy spots. If you’re ever unsure what will survive your winters, choosing genuinely winter-hardy plants is the single biggest favor you can do your future self.
Where to start: Do the pots first — they’re the most vulnerable because roots in containers get colder than roots in the ground. Group pots together in a sheltered corner, wrap the pots (not just the plants), and raise them slightly off the ground so they drain. Then mulch the bed crowns.
5. Clean, Sharpen, and Put Away the Tools
Tools left dirty and damp over winter come back rusty, blunt, and twice as much work next spring. It takes about twenty minutes: knock the soil off everything, wipe metal parts with an oily rag, sharpen blades and secateurs, and oil wooden handles if they look dry. Then store everything somewhere dry — a shed hook, a garage wall, anywhere out of the rain. Drain hoses completely and coil them; disconnect and store sprayers and nozzles.
Where to start: Fill a bucket with soapy water and do the whole lot in one go, assembly-line style. Finish with the oily-rag wipe-down — it’s the single step that prevents most winter rust.
Budget-friendly tip: A sharpened old tool outperforms a cheap new one. Twenty minutes with a file and some oil costs nothing and can add years to secateurs, shears, and spades you’d otherwise replace.
6. Give the Lawn Its Last Attention
The lawn needs very little in autumn, but what it needs is timely. Keep mowing while it’s growing, raising the blade a notch for the final cuts — slightly longer grass going into winter handles cold better. Clear the leaves (see step 2), and fill any worn patches now while there’s still warmth for seed to germinate. Skip heavy feeding this late; a light autumn feed is plenty if your lawn looks hungry, but most of the work is just the mowing and the clearing.
Where to start: Do one last proper mow at a higher setting, clear the leaves, and scatter seed on the bare patches, pressing it gently into the soil. Water it in and let the autumn rain take it from there.
A note about grass types: Autumn lawn care depends on the type of grass growing in your garden and your local climate. Cool-season grasses, such as fescue, ryegrass, and Kentucky bluegrass, generally benefit from autumn overseeding and suitable fall lawn care. Warm-season grasses, including Bermuda, Zoysia, and St. Augustine, have different seasonal requirements and may naturally slow down or turn brown as temperatures drop. In warmer regions without frost, your lawn may continue growing through much of autumn, so follow your local growing season rather than a fixed winter preparation schedule. Avoid heavy feeding or overseeding unless it is appropriate for your grass variety.
7. Sort the Pots and Containers
Empty pots are a frost risk and a clutter magnet. Decide each container’s winter fate: replant with something for the cold months (winter pansies, small evergreens, or a simple arrangement of branches and berries for the porch), store the empty ones upside-down somewhere sheltered, or group them with the tender plants under cover. Scrub out any pot that held a diseased plant before you reuse it — old soil can carry problems into next year’s planting.
Where to start: Gather every empty pot into one spot and make the call on each: replant, store, or recycle. One porch pot planted up for winter is worth more, visually, than five empties sitting in the rain.
8. Write Down What Worked
This is the checklist item everyone skips and everyone regrets skipping. Before the season blurs, jot down what thrived, what flopped, and what you’d move — which corner stayed soggy, which plant outgrew its spot, where the color gaps were. A few lines in a notebook or a phone note now is the planting plan for spring, written while the evidence is still fresh.
Where to start: Walk the garden once with your phone and snap a photo of each bed as it looks now. Add one line per photo: keep, move, or replace. Future-you, standing in the nursery in April, will be extremely grateful.
9. Refresh Empty Garden Beds With Compost
Once summer plants have finished, autumn is a convenient time to give tired garden beds a little attention. Remove weeds, loosen compacted surface soil gently, and spread a layer of finished compost over areas that need improving.
You don’t need to dig everything over. Leaving the soil structure undisturbed wherever possible helps protect beneficial organisms and maintain its natural layers. Compost can gradually work into the surface through rainfall and soil activity.
Where to start: Choose one empty bed and spread approximately 1–2 inches of finished compost over the surface. Avoid burying plant crowns or piling compost against tree trunks and shrub stems.
Budget-friendly tip: If you already make garden compost, autumn is a good time to use the finished material instead of purchasing expensive soil improvers.
Conclusion
Putting the garden to bed isn’t really about the garden — it’s about the gardener. A tidy, protected, well-noted garden in November is a gift to the person you’ll be in March, when the light changes and everything wants to start again. None of this needs to happen in a single weekend. Pick the two or three jobs that matter most for your plot, do those well, and let the rest be next weekend’s pleasant excuse to be outside.

Which job are you doing first — the leaves, the bulbs, or the tool bucket? Start with the one that bothers you most when you look out the window. That’s always the right one.
Related
- 10 Stunning Fall Porch Décor Ideas for a Warm and Welcoming Entry
- Smart Gardening Tech for Fall/Winter: Extend Your Green Thumb Through the Cold Seasons
- 10 Best Fall Flowers to Plant for Stunning Autumnal Color
- Wildlife-Friendly Garden in Fall and Winter: A Seasonal Guide
- Prevent Garden Mess from Heavy Rain: Expert Tips for a Rainproof Garden
- Fall Tablescapes: Creative Centerpiece & Table Setting Ideas
- 7 Cozy Fall Color Palettes for Every Room


